
I bought myself an 18th-century dress and then made some period accessories
I few months ago, I got contacted by Etsy Scandinavia for a collaboration against a gift card. I decided to splurge on a historical 18th-century dress so that I can attend events next summer without needing to borrow garments from my friends. The dress I selected was this 18th Century Dress in Ocoean Blue Linen from Atelier Serraspina in Spain.
I sent the atelier my measurements. I also asked if they could leave out the lacing holes at the front as I was thinking of sewing the eyelets by hand. Then I waited impatiently for a month until the package finally arrived.
Here is my YouTube video on the same subject
The 18th-century dress
The fit was very good considering that the makers had never seen me in person. I may have given a little bit too big back measurement but the way the dress was constructed (the bodice and the skirt were finished separately and only stitched together at the last stage) it was easy to take out 15 mm from the hem of the bodice. To be honest, most people wouldn’t even care about such a small fit issue!
I then talked about the lacing with my costuming friends and somebody suggested that I ditch the lacing for hooks and eyes that were also historically used. I liked this idea as it was quick and easy to do. Furthermore, I also had an interesting discussion about differences in 18th-century dress styles around Europe as this dress came from Spain. Linen dresses weren’t super common around Scandinavia but they were worn. They would probably also have some kind of embroidery on them.
The black lace cuffs caught the attention of some other Finnish costumers. I learned that the 18th-century lace here in the North was always white. Then I did some research and found out that Spain had a long tradition of making black lace. I found this 1799 portrait of Queen Maria Luisa by Francisco de Goya where the whole outfit seems to be black lace! The most common use for black lace in Spain was a mantilla shawl that women wore over their heads and shoulders. Besides lace, black details and decorations seemed to be more common in Spanish dress during the 18th century. With a quick research, I couldn’t find an example of black lace

This is what I love about the discussions with other costumers. You always learn something new and then get the opportunity to do more research. This little detail of black cuffs is now something that I may decide to keep just to remind myself about the interesting differences in costume around the continent.
The accessories
The bum pad
The dress looks nice just as it is but to wear it to 18th-century themed events, it needed some accessories. First I made a bum pad. These were very fashionable during that era as the cartoon below illustrates.

I didn’t use any pattern but just drew a half-moon shape straight on my folded fabric. I sewed the bum pad and filled it with polyester filling from an old pillow. The new bum pad was quite thick, so I then flattened it a bit by stitching across the pad by hand.

The apron and machine embroidery
The apron gave me a chance to try out my new (used) embroidery machine that I bought recently. It’s Husqvarna Viking Designer I usb and quite old but it works just fine, even though some little maintenance wouldn’t go to waste with it. I decided to try to make an embroidered hem for my apron. This means repeating the same pattern six times while aligning every repeat carefully to fit the previous one. My fabric was very sheer cotton which I backed with water-soluble interfacing.

Although the needle got caught a few times resulting in small misalignments, the embroidered edge looks nice after I trimmed away the extra fabric:

The cap
To make the cap, I bought the 18th-century Cap pattern from Burnley and Trowbridge on Etsy. This pattern doesn’t come with written instructions but it is meant to go with a sew-along on YouTube. I checked out the videos and then chose to ignore most of the instructions! Honestly, I didn’t like the idea of finishing all the edges before sewing the pieces together as making felled seams halved the job. I also used my machine to sew those straight seams as it doesn’t really show in the finished cap.
Unfortunately, the resulting cap was originally way too big for my small head. Luckily I could fix the sizing issue by shortening the back of the cap. I had to make a new channel for the drawstrings and new lacing holes but that didn’t finally take very long. Here is the finished cap:


The fichu
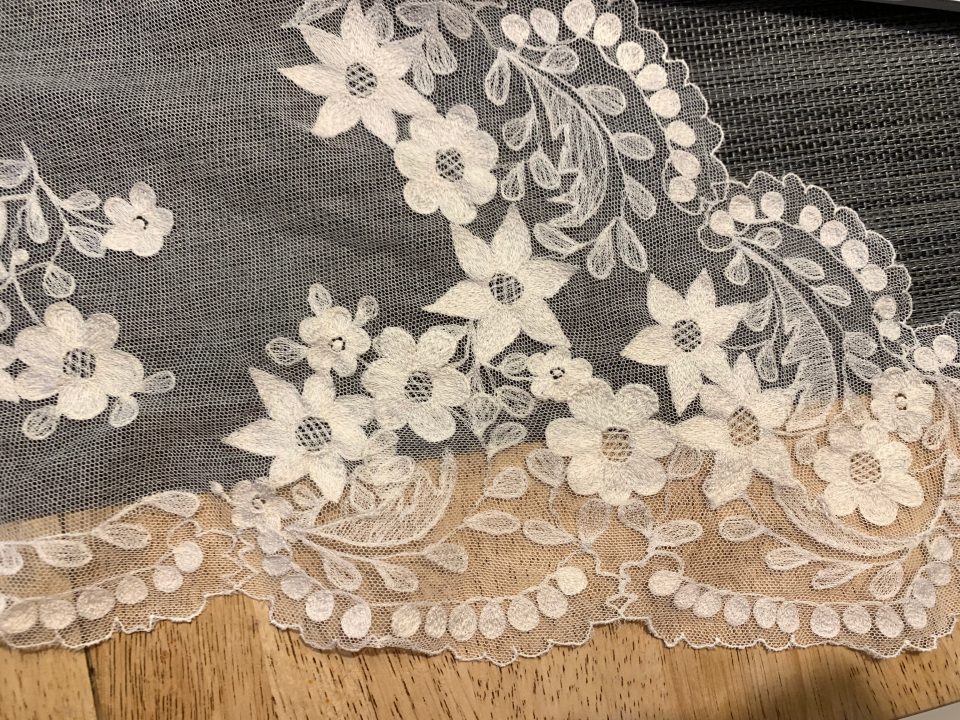
Some years back, I found a gorgeous but quite damaged silk tulle curtain from a second-hand shop. It had one corner that was mostly intact and some really nice edges. I now decided to use the corner to make a triangular fichu shawl.

I cut out the corner and then started pinning on lace from the edges to hide the raw edge. At this point it didn’t look that good:


But after I sewed each edging piece in place by hand carefully following the floral pattern and cut out the extra tulle it’s hard to see where the seam is:
The whole outfit
Besides the items I just made, my costume needs a petticoat and a pair of stays.


I think this 18th-century dress could be worn by a noble lady or a rich merchant’s wife at home. However, if I change some accessories, I can easily make this fit to a commoner such as a maid.
I have so many projects finished and am just struggling to get all the footage edited and published. Anyway, thank you for reading all the way to the end and see you soon with more sewing and other crafts!
Katja
Share this:


2 Comments
Maria thompson Björklund
I like it very much, it is beautiful together, and very inspiring! Maria
Tanit-Isis
What a fascinating detail about the black vs white lace! It’s a lovely outfit.